

Let’s see how Rule Learner can help you to build a decision model capable of evaluating a person’s Credit Status as “good” or “bad” based on different attributes such a Checking Status, Credit History, Purpose, Credit Amount, Saving Status, Age, Employment, Foreign Worker, etc.
To generate a decision model from these examples, you need to double-click on “createModel.bat” in the folder “openrules.learner” and fill out the person information in the dialog similar to this one:
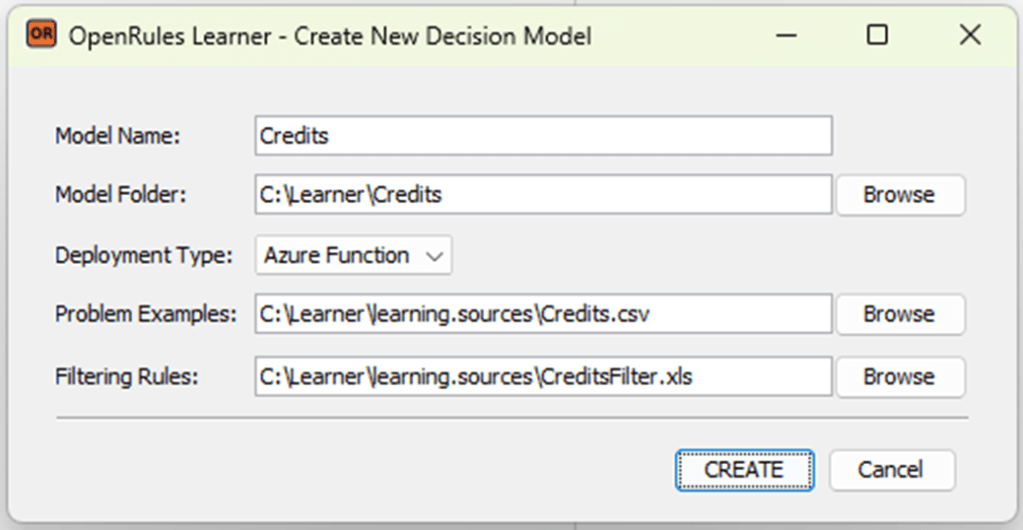
Here we assume that your installed Rule Learner in the folder C:/Learner. The name of the decision model will be “Credits” and the model will be generated in the folder “C:\Learner\Credits”. Here we selected use the deployment type “Azure Function”.
There are 1,000 examples with input and expected output located in the folder “learning.sources” in the file “Credits.csv“. Here is the top part of this file:
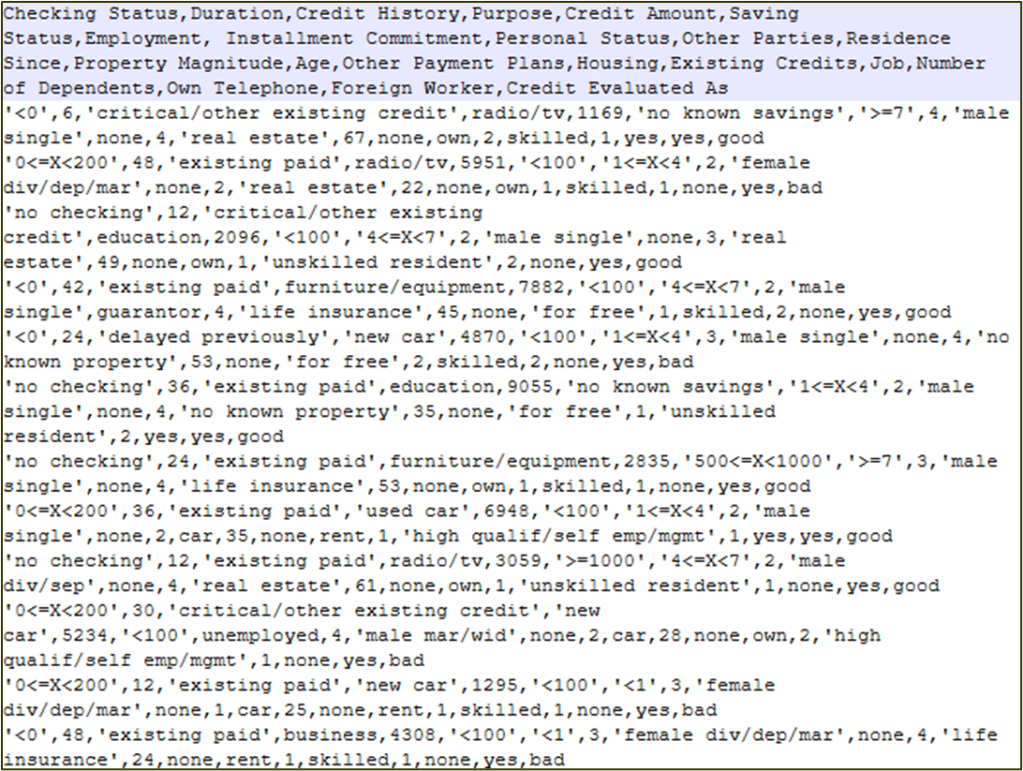
As you can see, each example contains different values for the following attributes: Checking Status, Duration, Credit History, Purpose, Credit Amount, Saving Status, Employment, Installment Commitment, Personal Status, Other Parties, Residence Since, Property Magnitude, Age, Other Payment Plans, Housing, Existing Credits, Job, Number of Dependents, Own Telephone, Foreign Worker, Credit Evaluated As. By default, Rule Learner will use all 1,000 examples to come up with the proper decision logic.
However, not all samples (training instances) play the same role when we evaluate a personal credit. That’s why we may generate different decision models for different categories of people. For example, let’s chose only those examples that characterize foreign workers who are 30 years old or older. We can do it by using the following filtering rules provided in the file “CreditsFilter.xls” of the folder “learning.source”:
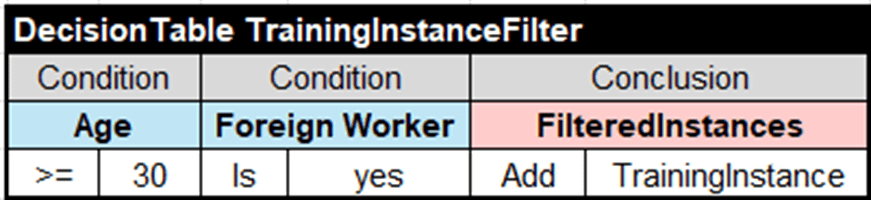
Similarly, we may define different training instance selection criteria and build different decision models from the same file CreditsFilter.csv.
When you click on the button “CREATE”, Rule Learner will generate the decision model “Credits”. Here is the generated content in the folder “C:\Learner\Credits”:

The folder “rules” contains all generated Excel files that represent this decision model. Other files will be used for testing/execution, analysis, deployment, and enhancement of the generated decision model.
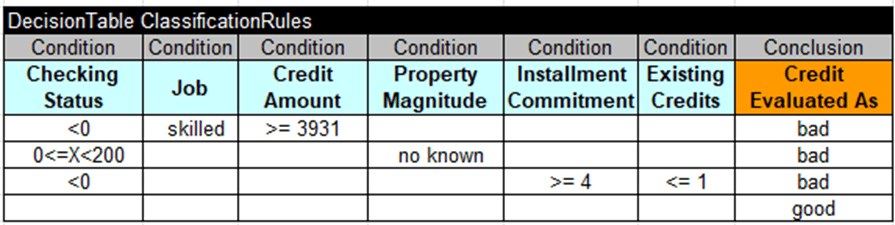
Rule Solver generated 3 version of decision tables with the same name “ClassificationRules“.
The file “GeneratedRulesRipper.xls” contains a decision table “ClassificationRules” produced using ML algorithm RIPPER known as Repeated Incremental Pruning to Produce Error Reduction:
The second tab inside this file shows all classification metrics including Average Accuracy=72.95%.
The file “GeneratedRulesC45.xls” contains a decision table “ClassificationRules” produced using ML algorithm C4.5 known as a pruned or unpruned decision tree:

The second tab inside this file shows all classification metrics including Average Accuracy=72.49%.
These variants of the ClassificationRules may be useful for a subject matter expert as an initial prototype for the actual classification rules. From experience, we know that usually RIPPER produces the most compact rules, while C4.5 usually produces much larger more rule sets that could be more precise but more difficult to understand. Still, all generated rule sets are statistical be their nature of ML and they always allow a certain inaccuracy. Thus, any automatically generated rules should be evaluated and in the many cases corrected by subject matter experts.
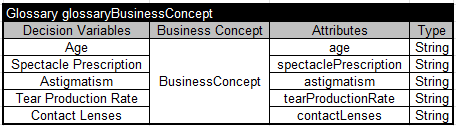
To make sure that the decision model is executable, Rule Learner adds two more files “rules/Glossary.xls“:
and rules/DecisionModel.xls“:
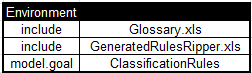
The last table “Environment” includes “GeneratedRulesRipper.xls” as the default generated rules. A subject mater expert may easily change them in this table to “GeneratedRulesC45.xls” or “GeneratedRulesTest.xls”.
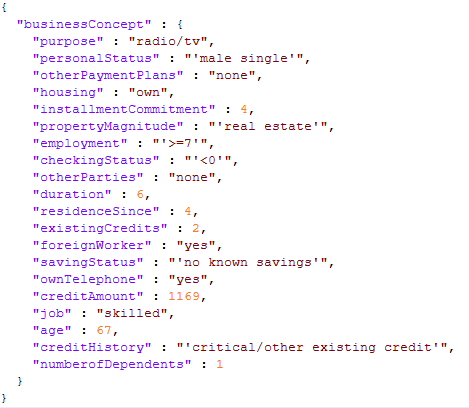
Rule Learner also generates two files “rules/Test.xls” and “rules/TestJson.xls” for testing purposes. It also generates JSON files with different test data located in the folder “json“. Here is an example of the fist test case:
There is one more generated sub-folder “target” that contains intermediate data needed by ML algorithms. It can be removed after the generation.
The generated decision model “Credits” is ready to be executed by a double-click on “test.bat”. By default, it will execute this decision model against the default rules generated by RIPPER. It will show all successful and failed test results and the summary:

If you run “explore.bat” you will open OpenRules IDE and will be able to execute each test in the rule-by-rule mode analyzing what exactly is going on:

You may enhance this decision model using the standard OpenRules decision modeling and deployment capabilities.

